Employee Onboarding Completion by Admins
Welcome to the Employee Onboarding Completion by Admins guide in DecisionHR. Here, we'll navigate the crucial final steps of verifying new employees' information, ensuring a smooth transition into your team. This concise guide provides a roadmap for admins to finalize onboarding with precision, covering essential verification processes and document reviews.
What is this onboarding step?
This step is the third and final step of employee self-onboarding. In this step, the company's admin completes the onboarding process for the new employee.
The company's admin shall verify every piece of information that the employee might have provided in the previous step of the onboarding. The information that our system might require the company admin to verify is based on the onboarding option choice your company's admin made in the first onboarding step.
Where to complete the step in the app
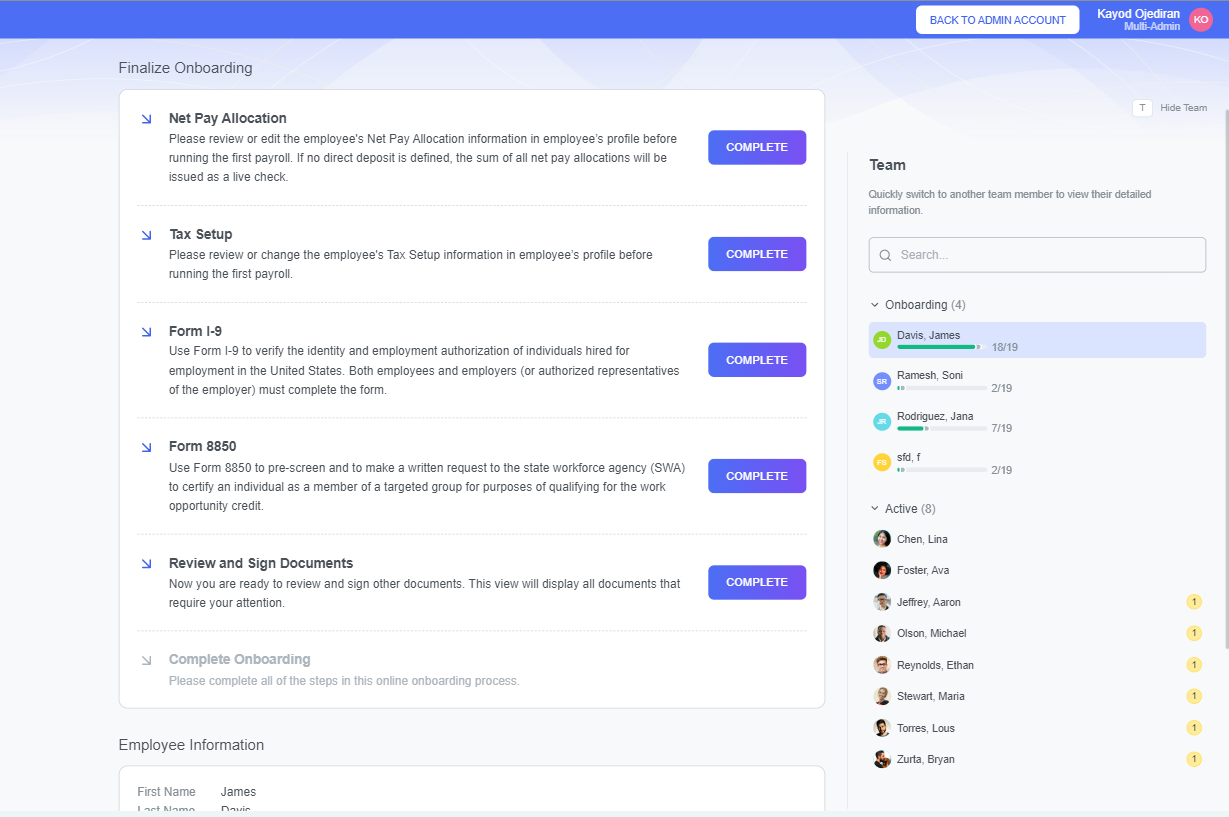
To complete the final step of employee onboarding, you navigate to the Teams section of the app. You can do this by clicking on the Teams button at the left-hand side of the app or by using the Teams widget on your dashboard.
How do you complete this onboarding step?
The final onboarding step begins after the employee completes the self-onboarding step. The system automatically adds the employee's information to the Teams section, where the company admin can quickly review the onboarded information.
In this onboarding step, the company's admin verifies the employee's onboarded information in about five different processes depending on the onboarding option the admin chose in the first step.
The steps include the following depending on the onboarding option the admin chose:
Net Pay Allocation
You review the Net Pay Allocation information in the employee's profile before running the first payroll. If the employee did not set up a bank account for direct deposit, the sum of all net pay allocations will be issued as a live check.
You click on COMPLETE to open a modal that contains information about the Net Pay Allocation. After reviewing the information, click on COMPLETE to move to the next step.
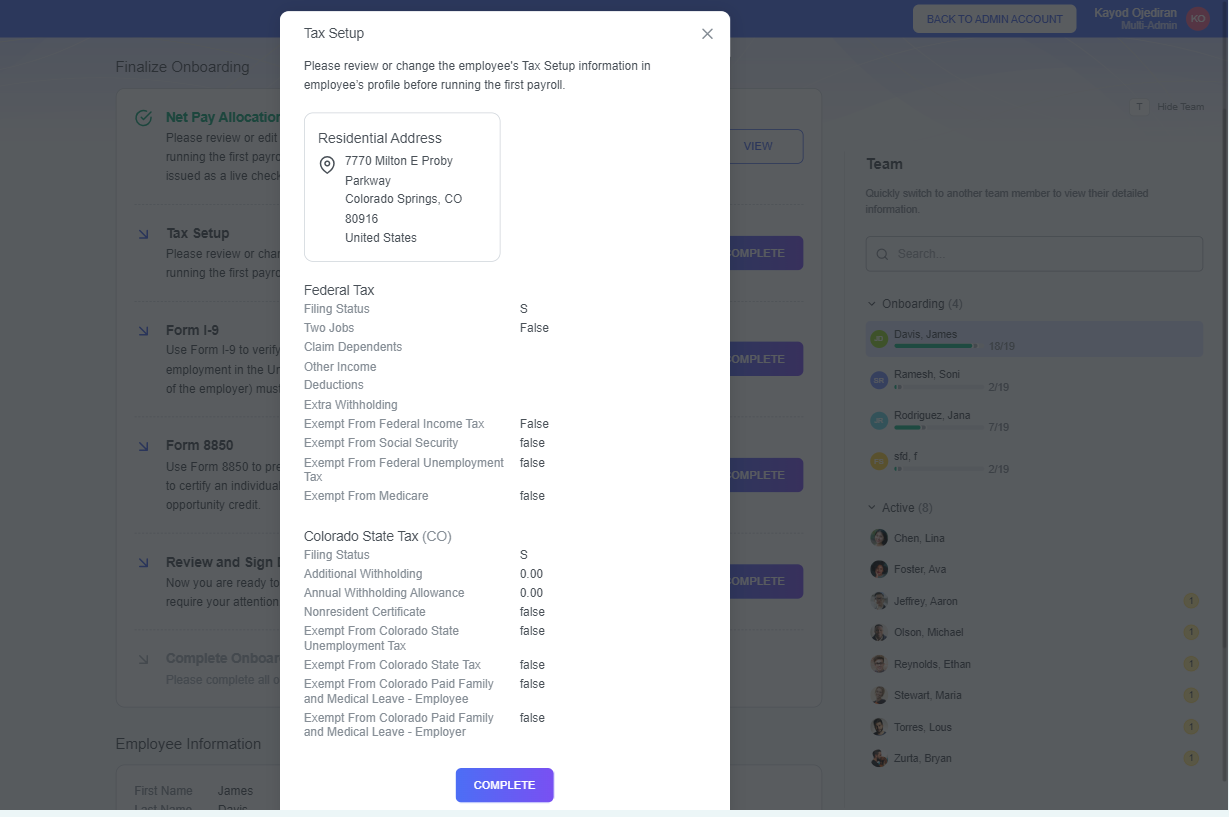
Tax Setup
You review the employee's Tax Setup information before running the first payroll. You click on COMPLETE to open a modal that contains information about the Employee's Tax Setup. After reviewing the information, click on COMPLETE to move to the next step.
Form I-9
Depending on the onboarding option you chose in the first phase of the onboarding, you may skip this step. The Form I-9 is to verify the identity and employment authorization of individuals hired for employment in the United States.
After the employee completes their part in the previous phase of the onboarding, you must verify their information and complete the form. To complete the form, click on the COMPLETE button, which opens up a modal with a list of fields to review and complete.
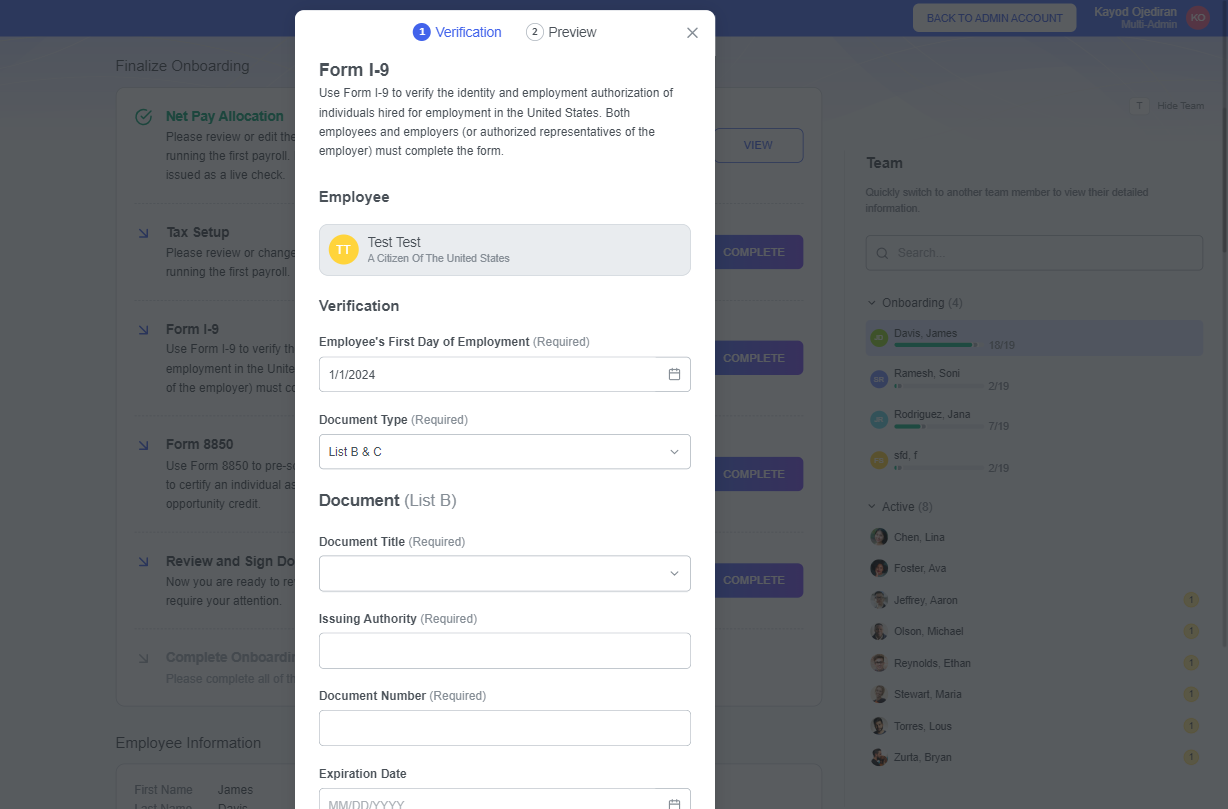
The fields for you to verify include:
Employee's first day of employment
This field is usually preset based on information from the onboarding first phase. Still, you can edit the date here by using the calendar icon on the field or entering the date manually.
Document Type
In this field, you select the employee's identification document type from the options drop-down. The options are : [List A] and [List B&C].
Depending on the option you choose, the system modifies the subsequent fields. By selecting List A, the employee provides only one of two options of identification that you will select from the drop-down box in the following field. However, choosing List B&C means that the employee will provide two of many options for identification.
Document Title
This field is where you select, from the drop-down box, the identification document that the employee provides.
For List A, the field contains just two options. The options are:
- U.S. Passport
- U.S. Passport Card
For List B&C, the list of options in this field includes the following:
- Driver's license issued by state or territory
- ID card issued by state or territory
- Government ID
- School ID
- Voter's Registration Card
- U.S. Military Card
- U.S. Military Draft Card
- Military Dependent's ID card
- USCG Merchant Mariner Card
Issuing Authority
In this field, you input the government agency or parastatal that issued the identification document to the employee.
Document Number
You put into this field the unique document number for the document that the employee provided.
Expiration Date
This date may not be required for some documents, but the system requires this date in some other documents. The expiration date is when the employee can no longer tender the document as a means of identification. You can manually enter the date or use the field's calendar icon.
After completing this information, you toggle the ATTESTATION box and select the employee's preferred signature option. This option could be either electronic or the wet-ink method.
The fields to complete for your business or organization include:
- Company's name
- Company's address
The fields that you, as the company's admin, complete include:
- Title
- First Name
- Last Name
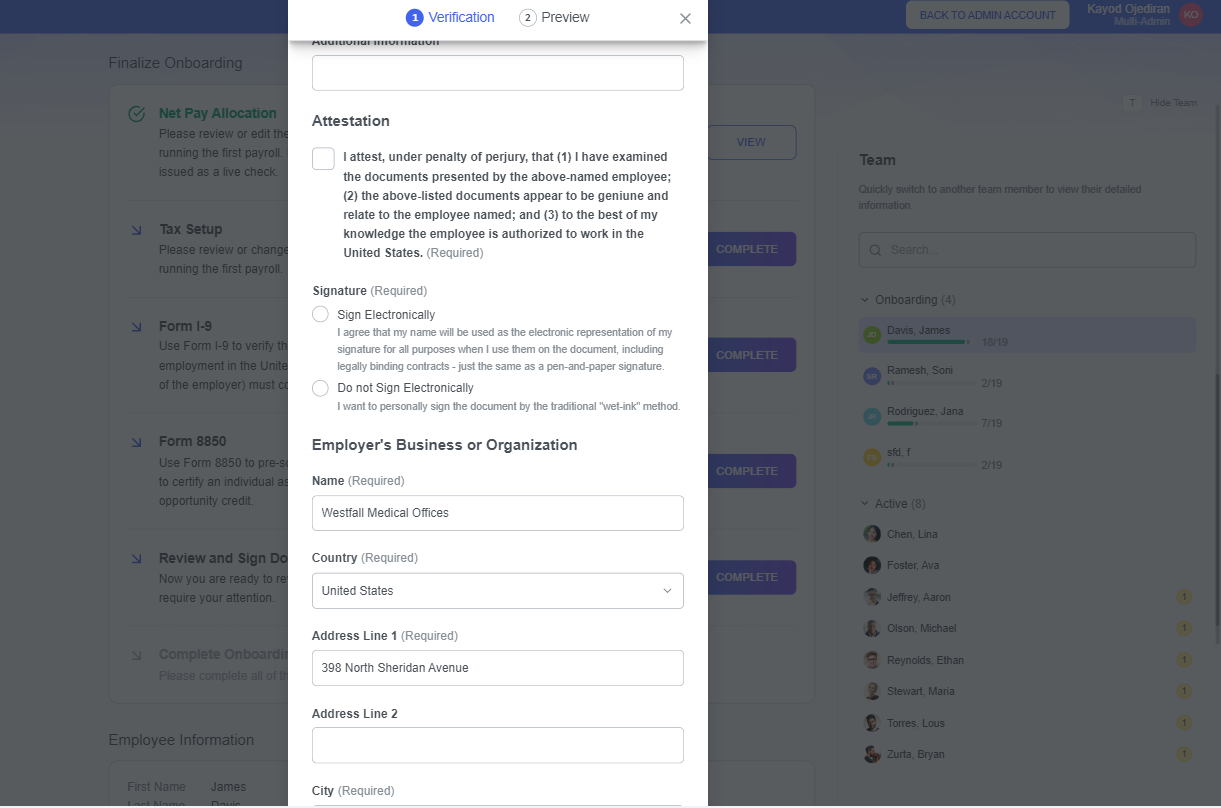
After completing this information, click on SUBMIT to move to the PREVIEW step. After the preview, click on COMPLETE to finish the step.
Form 8850
You verify and complete the form 8850 to pre-screen and make a written request to the State Workforce Agency (SWA) to certify an individual as a member of a targeted group to qualify for the work opportunity credit. Depending on the onboarding option you chose in the first phase of the onboarding, you may not need to complete this step.
Click on COMPLETE to open a modal, where you verify information in the different fields. The fields include:
Employer's information
This field contains information that includes the Company's name, Phone number, and Address. If the company has an alternate contact, you can toggle the Alternate Contact box to fill in the information in the fields revealed.

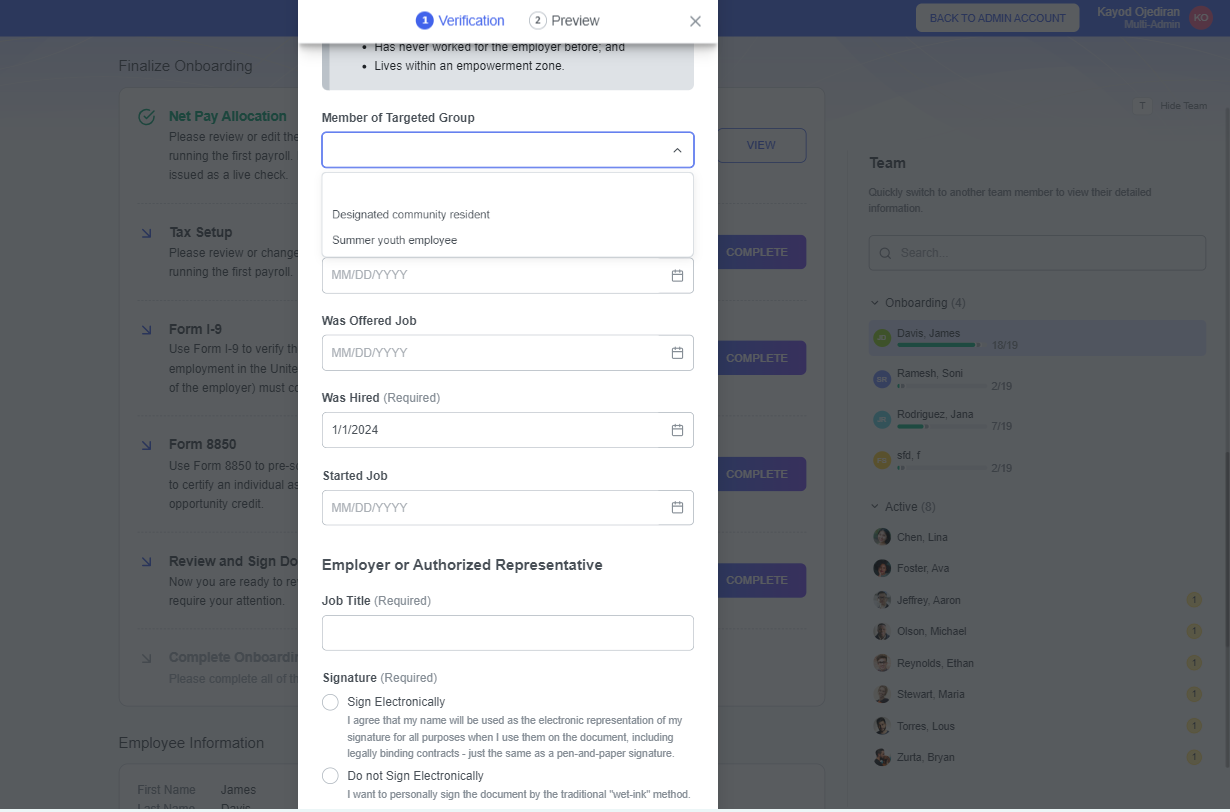
Applicant's Data
This field has multiple fields as well. One such field is the Targeted Group field. You select if the employee is a targeted group member from the drop-down box in this field. Your options include [Designated Community Resident] or [Summer Youth Employee].
The remaining fields in the applicant's data fields include the following:
- Gave information- You select the date when you gave information about the job opening at your company.
- Was offered job- Input here the day you offered the role to the employee.
- Was hired- You provide the hire date of the employee.
- Started job- Fill in here the date of the employee's first day on the job.
The company's admin completing this process provides information about their job title in the following field and decides what method of signature to apply. They can sign electronically or manually.
After this, click NEXT to move to the PREVIEW step. If everything looks good, click on COMPLETE. Otherwise, return to the previous step to make edits.
Documents review
This step is the final step in the onboarding process, where the company's admin and employee review and sign other company documents like the Employee Handbook, Company Policies, etc.
After reviewing, you toggle the Attestation box if all information is correct and choose your method of signature, which could be electronically or by wet-ink method. If signing electronically, the Employer's Signature Name field becomes required.
Click on COMPLETE to finish the whole process.