Manual Employee Onboarding
Welcome to the Manual Employee Onboarding guide in DecisionHR, where you take the reins in integrating new hires into your team. This detailed approach allows you to input personal, pay, and tax information directly, offering a hands-on method to ensure all necessary data is accurately captured. Ideal for those who prefer a more controlled onboarding process, this guide walks you through each step, from adding personal details to setting up tax and pay information, ensuring a seamless transition for your new team member.
What is Manual Employee Onboarding?
When you want to onboard an employee manually, you do the whole onboarding process, with the employee only providing their personal information. Unlike employee self-onboarding, where the employee has significant input and control over what information you onboard, choosing the manual employee onboarding option relinquishes the responsibility only to you.
Where can you manually onboard employees in the app?
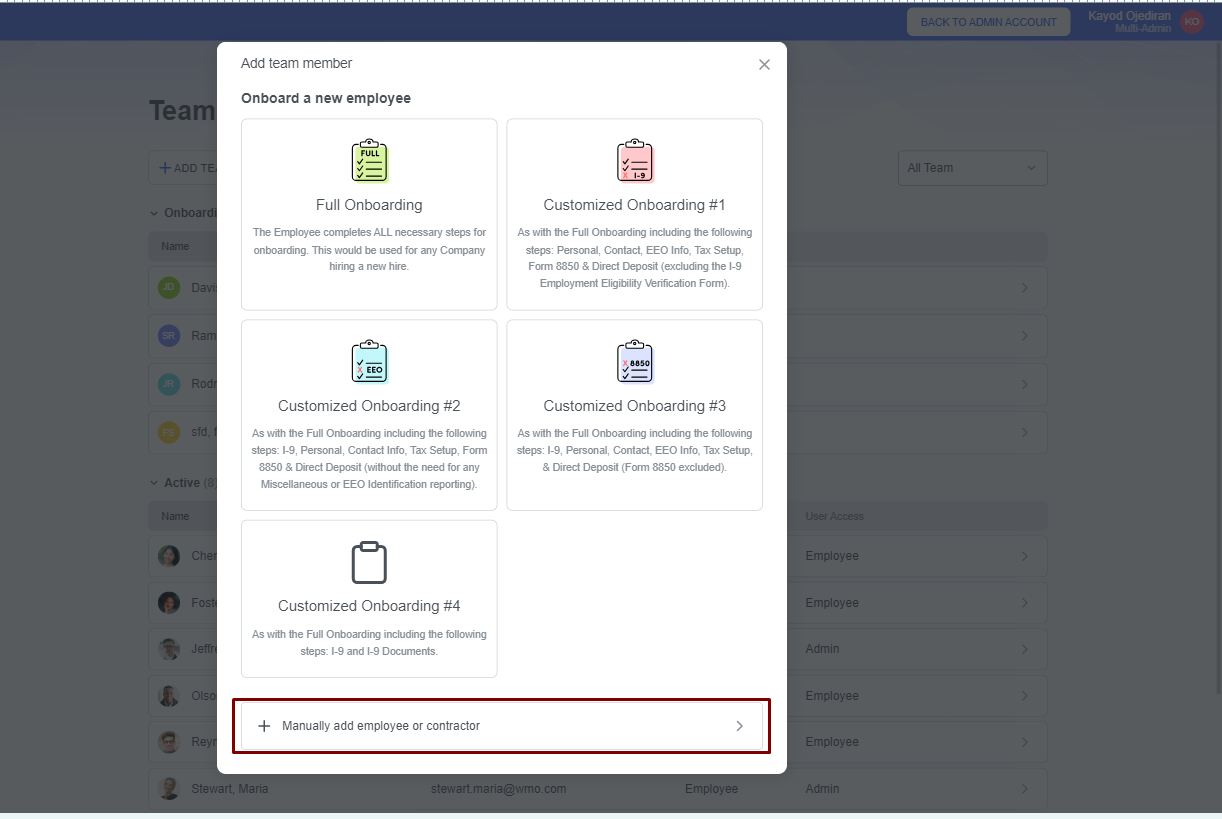
You can onboard employees manually from the Teams section of the app. In the Teams section, you click on Add Team Member. At the bottom of the following modal, click Manually Add Employee or Contractor.
How do you onboard employees manually?
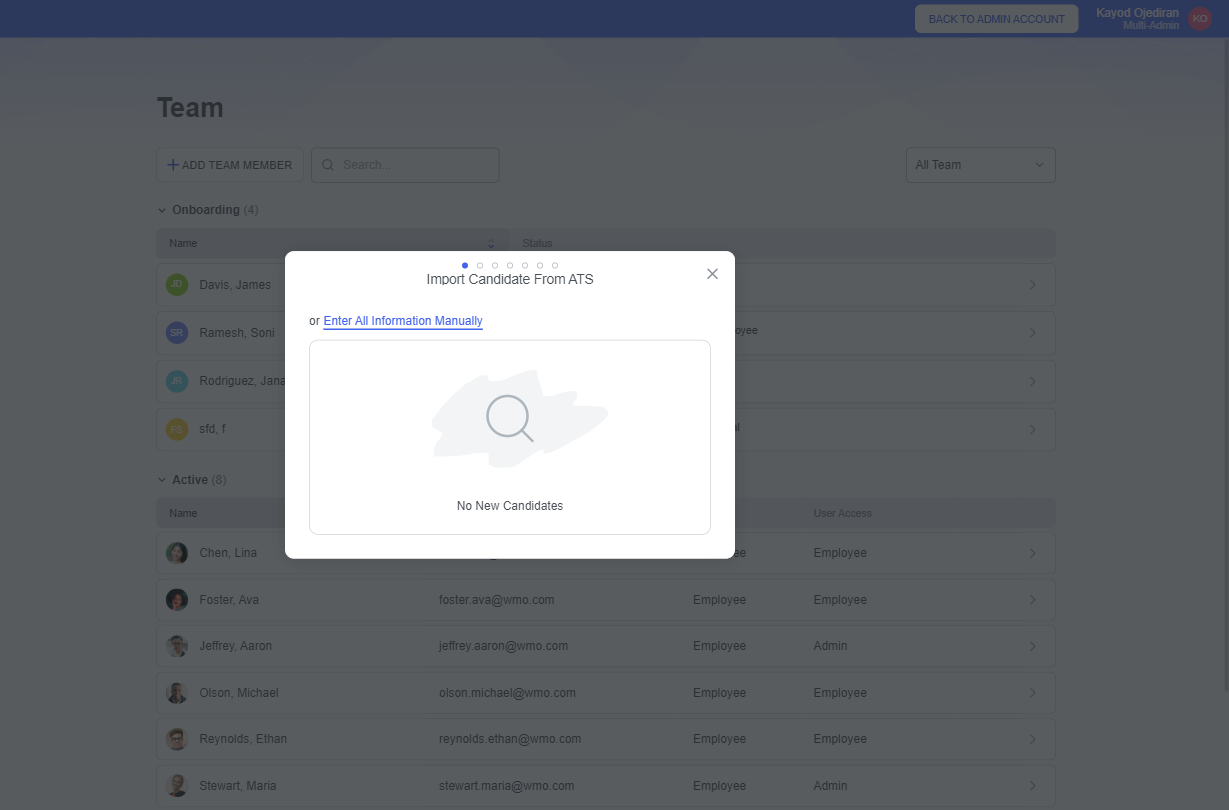
After navigating to the Manually Add Employee, you can import the employees from your [Integrated ATS] or the employees' details yourself. With Integrated ATS, you can select the candidate to onboard their information into the system and then continue the process.
The process of manual employee onboarding consists in 6 steps, which are:
- Personal Information
- Residential Address
- Pay Information
- Tax Setup
- Deductions
- Time Off
Personal Information
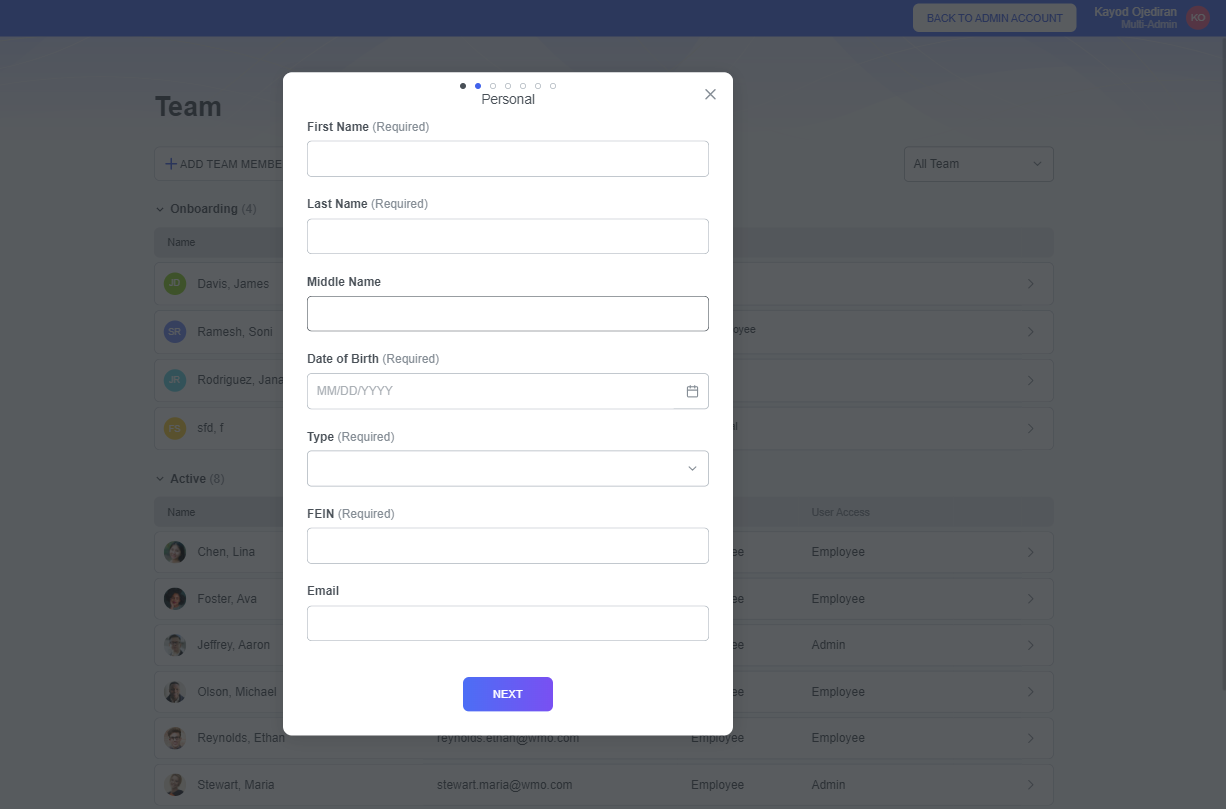
In this step, you complete the following fields:
- First Name - You type the employee's first name into this field.
- Last Name - You input the employee's last name in this field.
- Date of Birth - You can manually type the employee's date of birth in this field or use the calendar icon.
- Employment Type - Select the employee's employment type from the drop-down box in this field. You can select the Employee or Contractor option.
- SSN - Type in the employee's Social Security Number in this field.
- Email - Put in the employee's provided email address.
SSN Requirements
When adding a new team member, please ensure the Social Security Number (SSN) follows these official guidelines:
- Must be in this format: 123-45-6789
- Cannot begin with 9
- Cannot start with 666 or 000
- Cannot have 00 as the fourth and fifth digits
- Cannot have 0000 as the last four digits
- These rules are based on the guidelines from the Social Security Administration to help ensure that the SSN is valid.
Note: While our system allows entry of any SSN format, an incorrect SSN may be rejected later by government agencies or third-party services. Please confirm the accuracy of the SSN with the employee before saving.
After filling in the required information, click NEXT to move to the following step.
Residential Address
This step requires that you fill in the fields with the employee's full address. The required fields are:
- Address Line 1
- City
- State
- Zip code
The Address Line 1 field has a Whisperer feature, which provides suggestions for your address. When you click the matching address, it automatically completes the other required fields in this step. After completing the fields, click on the NEXT button.

Pay Information
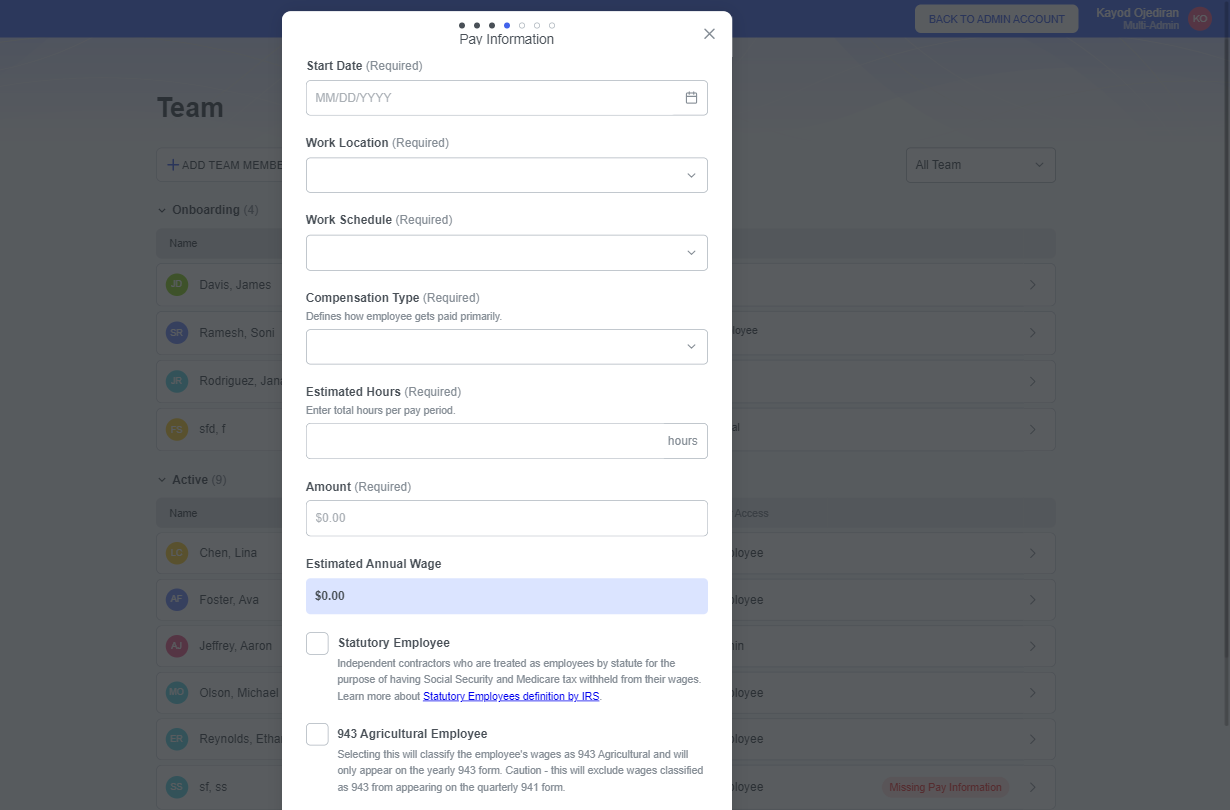
This step has the following fields that you must complete before proceeding to the following steps:
- Start Date- Choose the date of the employee's first day of work by clicking the calendar icon on the field or typing it manually using the MM/DD/YYYY format.
- Work Location- You select the employee's preferred work location depending on the company's policy.
- Worker's Compensation Code- After selecting the employee's work location, this field becomes visible for you to choose the compensation code for the employee's state. If you have not set up the [Worker's Compensation] for that state, the system will prompt you to set it up.
- Work Schedule- You can select from the drop-down options that include Full Time, Part Time, Temporary, Intern, and Seasonal.
- Compensation Type- In this field, you select the option that best defines how you want to pay the employee primarily. The options are: Salaried, Hourly, Per Unit, Commission, 1099, Owners Draws and Tipped.
- Compensable Hours- You type in the employee's total hours per pay period.
Depending on the Compensation Type, you will fill in another field that determines the amount you pay the employee. For example, if your employee is Salaried, you must specify the Amount you want to pay them. You can toggle any of the two boxes if the employee is a [Statutory Employee] or [943 Agricultural Employee].
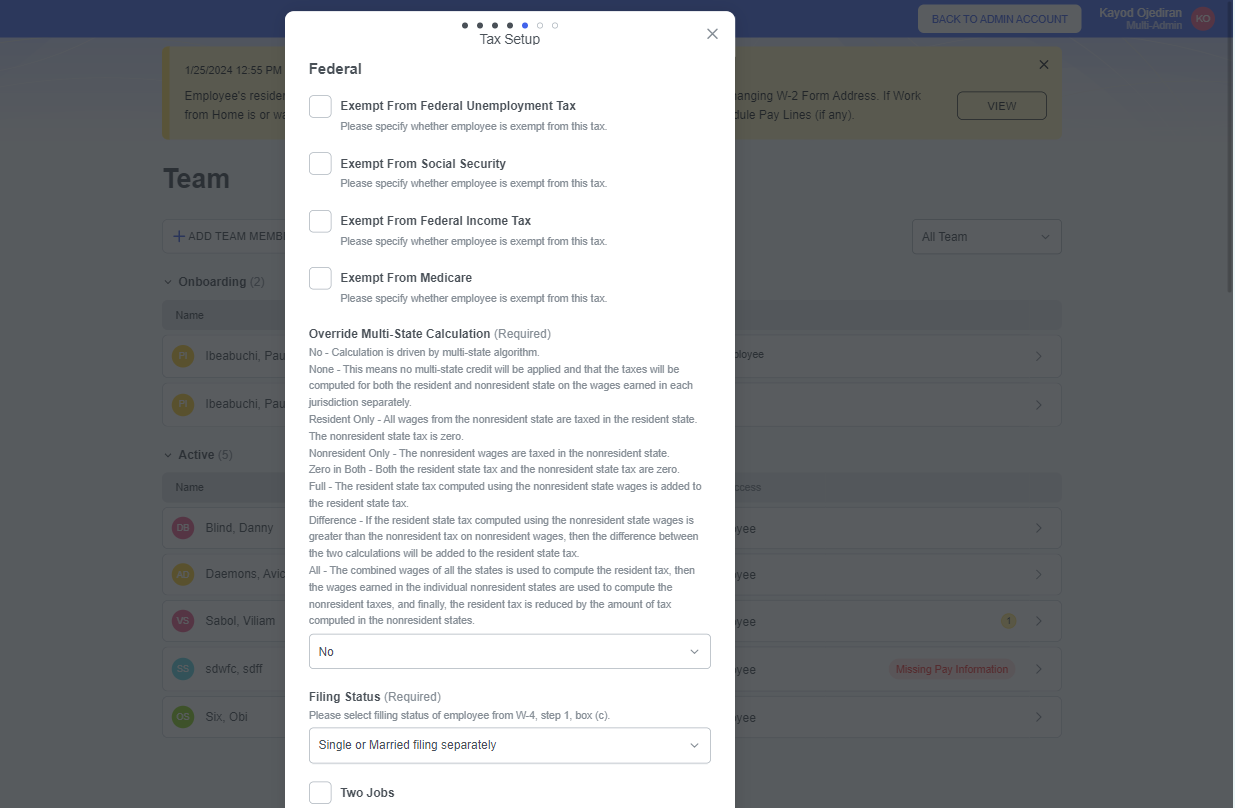
Tax Setup
You set up the employee's Federal and State Taxes in this step. If the employee is exempt from any of the following Federal taxes, you can toggle the corresponding box:
- Exempt From Federal Unemployment Tax
- Exempt From Social Security
- Exempt From Federal Income Tax
- Exempt From Medicare
Other required fields include:
Override Multi-State Calculations
In this step, you can select from the drop-down options. The options include:
- No - Calculation is driven by a multi-state algorithm.
- None - This means no multi-state credit will be applied, and the system computes the taxes for both the resident and non-resident states based on the wages earned in each jurisdiction separately.
- Resident Only - All wages from the non-resident state are taxed in the resident state. The non-resident state tax is zero.
- Non-resident Only - The non-resident wages are taxed in the non-resident state.
- Zero in Both - Both the resident state tax and the non-resident state tax are zero.
- Full - The resident state tax computed using the non-resident state wages is added to the resident state tax.
- Difference - If the resident state tax computed using the non-resident state wages is greater than the non-resident tax on non-resident wages, then the difference between the two calculations will be added to the resident state tax.
- All - The states' combined wages are used to compute the resident tax. The wages earned in the individual non-resident states are used to calculate the non-resident taxes. Finally, the resident tax is reduced by the tax computed in the non-resident states.
Filing Status
You select the employee's filing status from the drop-down box. The options to choose from include:
- Single or Married filing separately
- Married filing jointly or qualifying surviving spouse
- Head of Household
- Non-Resident Alien
Other non-required fields include:
- Two jobs- You toggle this box if the employee works two jobs for appropriate filing in the Form W-4.
- Claim dependents- You type in the amount claimed by the employee's dependents.
- Other income- Input the amount of the employee's other income.
- Deductions- Type in the total deductions from the employee's pay.
- Extra withholdings- Enter the amount the employee withheld from their Form W-4.
After completing the federal taxes, you complete the employee's state tax setup.
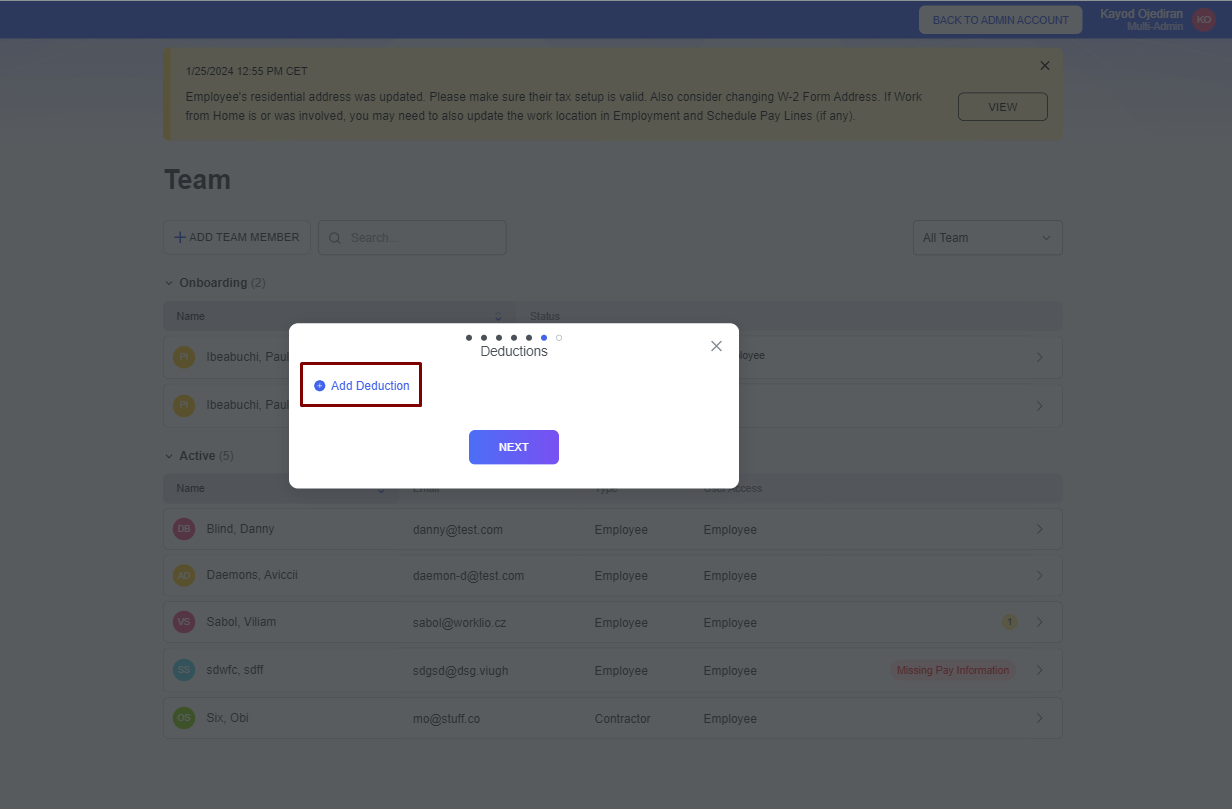
Deductions
In this next step, you can add benefit deductions if there are any for the employee. To add deductions, click Add Deduction.
A new modal appears where you select the type of benefit deduction you want to add from the list of options that you have.
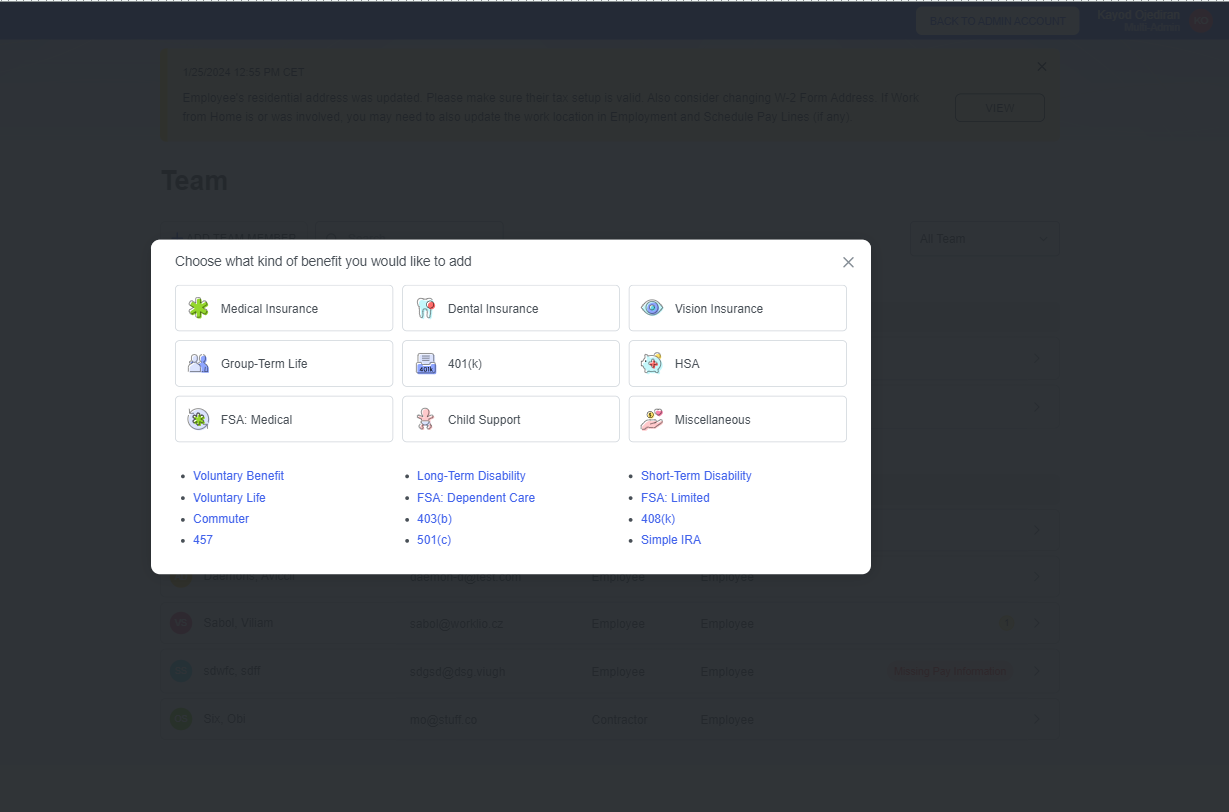
After choosing the deduction type, you set it up by filling in the required fields.
After filling the fields with accurate information, click NEXT to proceed to the final step in the manual employee onboarding.
Time Off
In this final step, you set up initial balances for each Accrual Time Off you want this employee to use. You can also set this up later in the Team section.
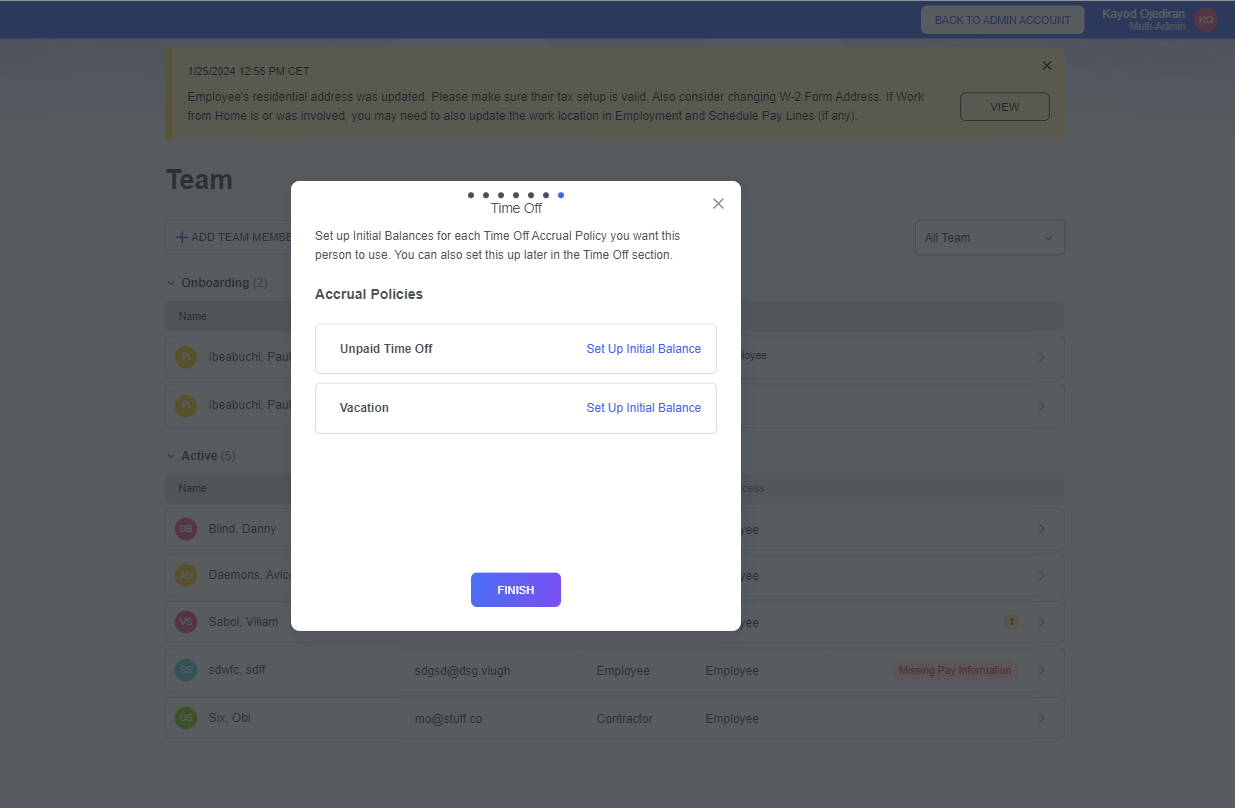
In this step, you can set up Vacation and Sick Time initial balances. Click Set Up Initial Balanceto set up any of them. A modal appears where you complete the following fields:
- Policy Start Date- You enter the date when the employee's entitlements begin in this field.
- Hours Worked- Enter the number of hours the employee has worked before.
- Hours Accrued- Put in the number of hours the employee has already accrued in the current accrual year.
- Hours Used- Type in number of hours already used by the employee in the current accrual year.
- Roll Over Balance- You enter the number of hours the employee has rolled over from the previous accrual year.
After you have set up the time off policy, if it applies to your company, click on the FINISH to complete the Manual Employee Onboarding. Return to the employee's profile in the Teams section to set up the employee's [Net Pay Allocation] that the system automatically set as Check.